

These Halloween Oreo truffles start like classic cream cheese Oreo balls. Crushed Oreos are mixed with cream cheese, rolled, chilled and dipped in white coating. The Halloween part is the decorating: a blue or green iris, a black pupil and a few thin red veins turn each white truffle into a bloodshot eyeball.
They need only three main ingredients (Oreos, cream cheese and white coating) plus tube icing for the details. There is no oven involved. Most of the time is chilling, and the hands-on work is mostly dipping and decorating. If you’d rather skip the drawing, candy eyeballs press onto the wet coating for a faster version.

Ingredients
For the truffles
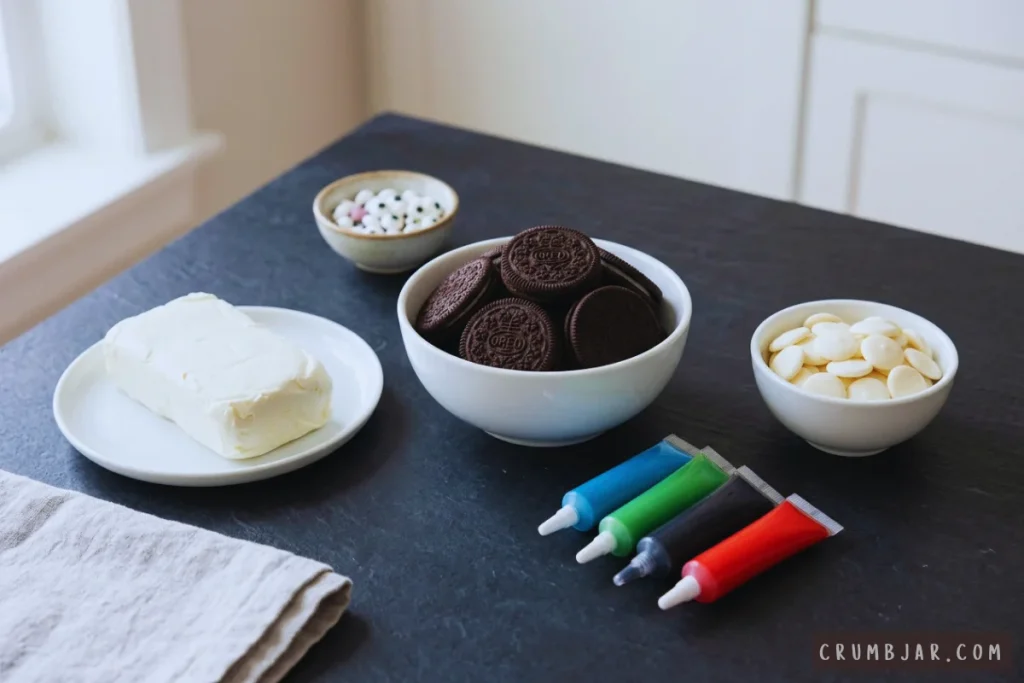
- 1 package (14.3 oz / 405 g, about 36 cookies) regular Oreo cookies, filling included
- 8 oz (226 g) full-fat block cream cheese, softened
- 16 oz (450 g) white candy melts, white almond bark or white baking bars
- 1 to 2 teaspoons refined coconut oil or vegetable shortening, only if the coating is too thick
For the eyeballs
- 1 small tube each of blue, green, black and red decorating icing or gel (writing-tip tubes work well)
- Optional shortcut: 36 small candy eyeballs
Ingredient Notes
- Oreos: Use regular Oreos and keep the filling in. Double Stuf cookies have more cream, which can make the dough softer, so they may need extra chilling.
- Cream cheese: Use full-fat block cream cheese, softened at room temperature for about 30 minutes. Whipped, tub-style or reduced-fat versions are softer and can make a sticky dough that is hard to roll.
- White coating: Candy melts, almond bark and white baking bars melt smoothly and set firm without tempering. White chocolate chips can work, but they are formulated to hold their shape and often melt thicker, so you may need a little oil.
- Allergens: The truffles contain wheat, milk and soy. Check labels on the cookies, coating and icing if you’re serving guests with allergies.
Equipment
- Food processor (or a zip-top bag and rolling pin)
- Rimmed baking sheet lined with parchment paper
- 1-tablespoon cookie scoop (optional)
- Deep, narrow microwave-safe bowl or mug for dipping
- Fork and toothpick
Time and Yield
- Prep: 30 minutes
- Chilling and setting: 55 minutes
- Dipping and decorating: 45 minutes
- Total: about 2 hours 10 minutes (hands-on time is about 75 minutes)
- Yield: about 36 truffles, each about 1 inch across
- Difficulty: Easy
Instructions
- Crush the Oreos. Line a rimmed baking sheet with parchment paper. Pulse the whole cookies, filling included, in a food processor until you have fine, even crumbs with no large chunks. Without a food processor, seal the cookies in a zip-top bag and crush them with a rolling pin until fine.
- Mix the dough. Add the softened cream cheese and process (or stir with a sturdy spoon or your hands) until the mixture is dark, evenly moist and clumps together when pressed. There should be no streaks of white cream cheese.
- Shape the truffles. Scoop level tablespoons of dough and roll each between your palms into a smooth ball. Place them about 1 inch apart on the baking sheet. If the dough sticks to your hands, chill the bowl for 15 minutes first.
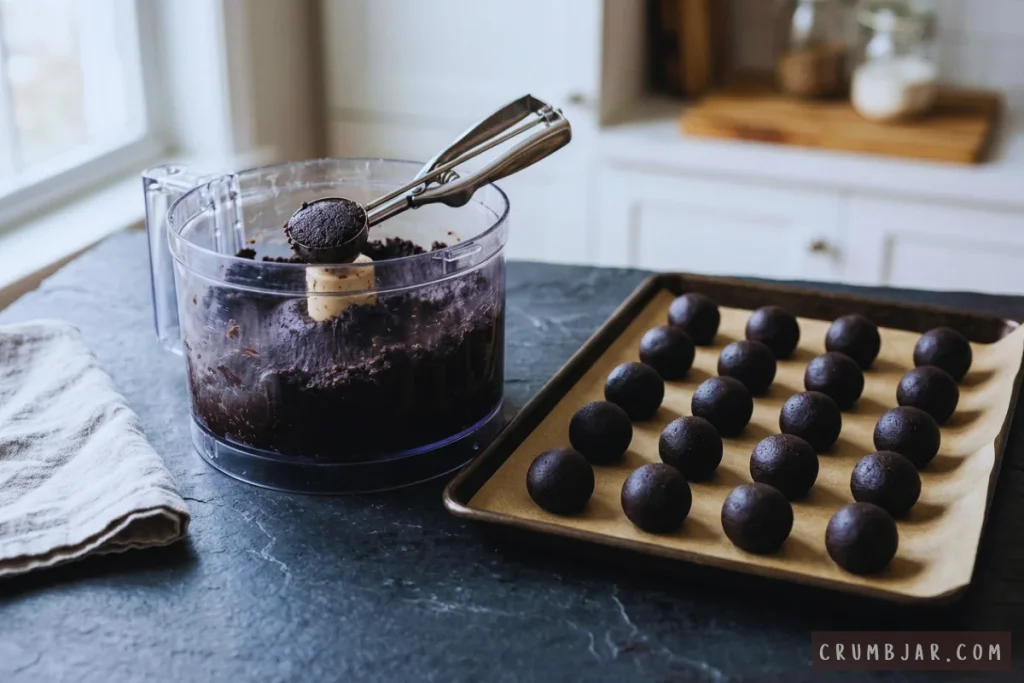
- Chill until firm. Freeze the truffles for 15 to 20 minutes, or refrigerate about 1 hour. They should feel firm but not frozen solid.
- Melt half the coating. While the truffles chill, put 8 oz of the white coating in a deep, narrow microwave-safe bowl. Microwave at 50% power in 30-second bursts, stirring each time, until smooth. Stop heating when only a few small lumps remain and stir until they melt. Melt the remaining coating once the first batch runs low. Keep water away from the coating, because even a drop can make it clump.
- Dip in small batches. Keep the other truffles in the refrigerator while you work. Drop one truffle into the coating, turn it with a fork to cover it completely, then lift it out and tap the fork on the rim of the bowl a few times to shed the excess. Slide the truffle onto the parchment with a toothpick. If you’re using candy eyeballs, press one onto each truffle now, while the coating is wet.
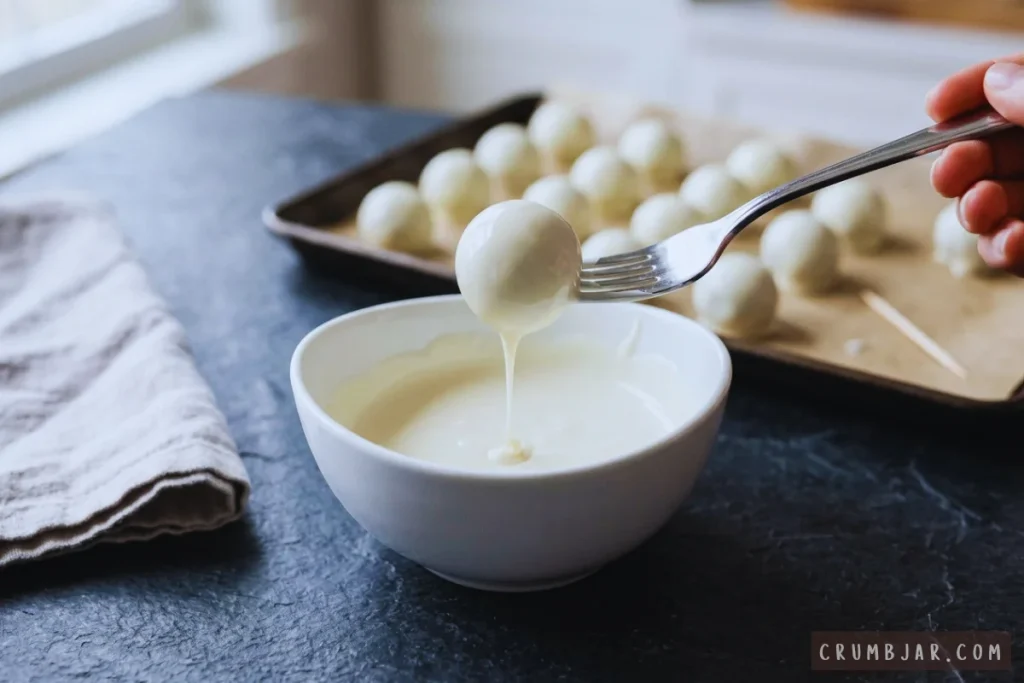
- Set the coating. Refrigerate the dipped truffles for about 20 minutes, until the coating is hard, matte and no longer tacky.
- Draw the irises. Hold a tube of blue or green icing close to the surface of a truffle and squeeze out a round dot about ½ inch wide, then lift away. Add a black dot about ⅛ inch wide in the center for the pupil. Alternate blue and green for variety.
- Add the veins. With the red icing, draw thin, slightly wavy lines from the edge of the truffle toward the iris, branching once or twice. Stop before reaching the iris. Short, fine lines look more realistic than long ones.
- Let the icing set. Leave the truffles at cool room temperature for about 15 minutes, then refrigerate them until serving.
Tips for Success
- Make sure the truffles are firm before dipping. Soft centers lose their shape in the warm coating and drop crumbs into it. Skim any crumbs from the surface of the coating as you work.
- Use a deep, narrow bowl. It lets you cover a truffle in one dip, which leaves a smoother shell.
- Thin the coating if needed. If it falls from the fork in thick ribbons, stir in ½ teaspoon of coconut oil or shortening at a time.
- Avoid truffles that are frozen solid. If the shell cracks as it sets, the centers may be too cold. Let them stand for 5 minutes before dipping.
- Test the icing on parchment first. A practice dot shows how much pressure gives a clean circle.
- Wait for the coating to set before decorating. Icing drawn on tacky coating can smear.
Variations and Substitutions
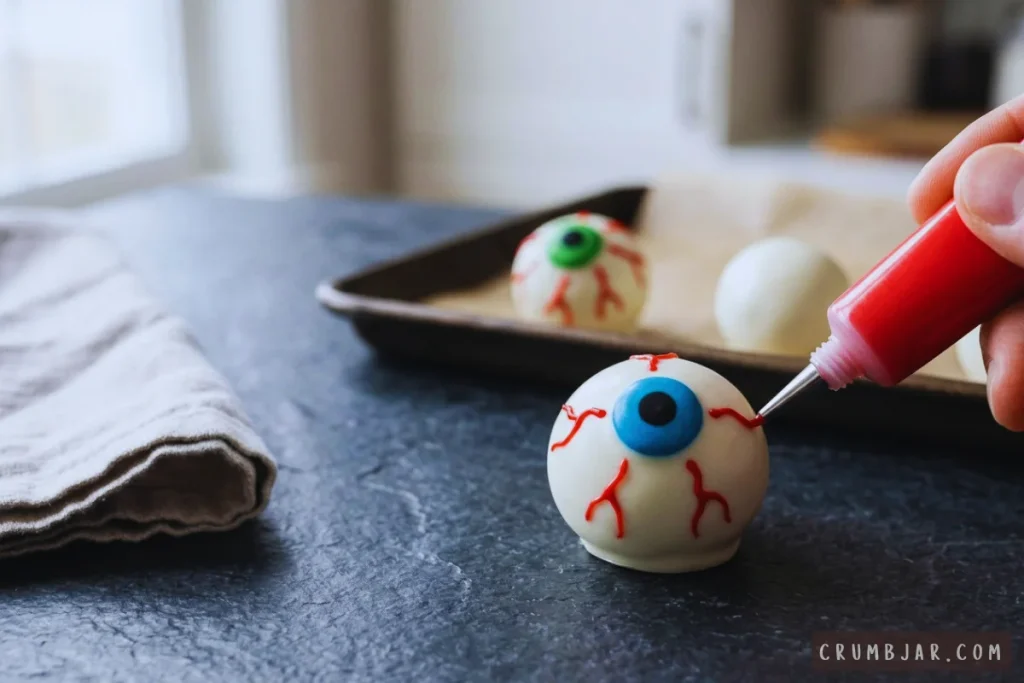
- Candy eyeball shortcut: Press candy eyes onto the wet coating right after dipping. You can still add red veins once the coating has set.
- Other eye colors: Brown, hazel or gray icing also works, as long as the red veins stay thin.
- Cookie or dairy swaps: Other sandwich cookies, gluten-free cookies or dairy-free cream cheese can change how firm the dough is, so expect to adjust the chilling time.
Storage, Freezing and Make-Ahead
Because the filling contains cream cheese, keep the truffles refrigerated.
- Refrigerator: Store in an airtight container in a single layer, or with parchment between layers, for up to 7 days.
- Freezer: Freeze for up to 2 months and thaw in the refrigerator. Freezing can affect the icing details, so for the sharpest look, freeze plain coated truffles and draw the eyes after thawing.
- Make-ahead: Coat the truffles a few days ahead and decorate them within a day of serving. Keep the container closed for about 10 minutes after taking it out of the fridge, which helps limit condensation on the icing.
- Serving safety: Don’t leave the truffles at room temperature for more than 2 hours. At a party, set out a few at a time and keep the rest chilled.
Serving and Presentation

Serve them cold in a single layer, eyes facing up, on a dark platter or tray. For a party spread, black or dark paper cupcake liners keep them from sliding and make the white coating stand out.
You Might Also Like: Easy Caramel Apple Cheesecake Dip.
Frequently Asked Questions
- Do Halloween Oreo truffles need to be refrigerated?
Yes. The cream cheese filling should stay chilled, and the truffles also hold their shape better when cold. - Can I use white chocolate chips instead of candy melts?
Yes, but chips often melt thicker. Melt them gently at 50% power, stir often and add a little coconut oil if needed. Baking bars or candy melts give a smoother coat. - Can I make these without a food processor?
Yes. Crush the cookies very fine in a zip-top bag with a rolling pin, then work the cream cheese in with a sturdy spoon or your hands until no white streaks remain. - Why is my coating thick, dull or lumpy?
Overheating and stray water are the usual causes. Melt the coating slowly in short bursts, keep utensils dry and thin it with a little coconut oil if it is still too thick.
Final Thoughts
These truffles look elaborate but come together from a short list of ingredients and a few tubes of icing. Make them a day or two ahead, draw the eyes when you have a quiet half hour, and keep them chilled until it’s time to serve.

Halloween Oreo Truffles with Creepy Eyeballs (No-Bake)
Equipment
- Food processor (or zip-top bag and rolling pin)
- Rimmed baking sheet lined with parchment paper
- 1-tablespoon cookie scoop (optional)
- Deep, narrow microwave-safe bowl or mug
- Fork
- Toothpick
Ingredients
For the Truffles
- 1 package regular Oreo cookies 14.3 oz, about 36 cookies, filling included
- 8 oz full-fat block cream cheese softened
- 16 oz white candy melts, white almond bark or white baking bars for dipping
- 1 to 2 tsp refined coconut oil or vegetable shortening optional, only if the coating is too thick
For the Eyeballs
- 1 small tube blue decorating icing or gel writing-tip tube
- 1 small tube green decorating icing or gel writing-tip tube
- 1 small tube black decorating icing or gel for the pupils
- 1 small tube red decorating icing or gel for the veins
- 36 small candy eyeballs optional shortcut, used instead of drawing the irises and pupils
Instructions
Make the Truffle Centers
- Crush the Oreos. Line a rimmed baking sheet with parchment paper. Pulse the whole cookies, filling included, in a food processor until you have fine, even crumbs with no large chunks. Without a food processor, seal the cookies in a zip-top bag and crush them with a rolling pin until fine.
- Mix the dough. Add the softened cream cheese and process (or stir with a sturdy spoon or your hands) until the mixture is dark, evenly moist and clumps together when pressed. There should be no streaks of white cream cheese.
- Shape the truffles. Scoop level tablespoons of dough and roll each between your palms into a smooth ball. Place them about 1 inch apart on the baking sheet. If the dough sticks to your hands, chill the bowl for 15 minutes first. You should have about 36 truffles.
- Chill until firm. Freeze the truffles for 15 to 20 minutes, or refrigerate about 1 hour. They should feel firm but not frozen solid.
Coat the Truffles
- Melt half the coating. While the truffles chill, put 8 oz of the white coating in a deep, narrow microwave-safe bowl. Microwave at 50% power in 30-second bursts, stirring each time, until smooth. Stop heating when only a few small lumps remain and stir until they melt. Melt the remaining coating when the first batch runs low. Keep water away from the coating, because even a drop can make it clump.
- Dip in small batches. Keep the other truffles in the refrigerator while you work. Drop one truffle into the coating, turn it with a fork to cover it completely, then lift it out and tap the fork on the rim of the bowl a few times to shed the excess. Slide the truffle onto the parchment with a toothpick. If you are using candy eyeballs, press one onto each truffle now, while the coating is wet.
- Set the coating. Refrigerate the dipped truffles for about 20 minutes, until the coating is hard, matte and no longer tacky.
Draw the Eyeballs
- Draw the irises. Hold a tube of blue or green icing close to the surface of a truffle and squeeze out a round dot about 1/2 inch wide, then lift away. Add a black dot about 1/8 inch wide in the center for the pupil. Alternate blue and green for variety. Skip this step if you used candy eyeballs.
- Add the veins. With the red icing, draw thin, slightly wavy lines from the edge of the truffle toward the iris, branching once or twice. Stop before reaching the iris. Short, fine lines look more realistic than long ones.
- Let the icing set. Leave the truffles at cool room temperature for about 15 minutes, then refrigerate them until serving.


Pingback: Graveyard Pudding Cups with Cookie Tombstones (No-Bake Halloween Dirt Cups) - Crumb Jar