
Prep Now, Relax Later
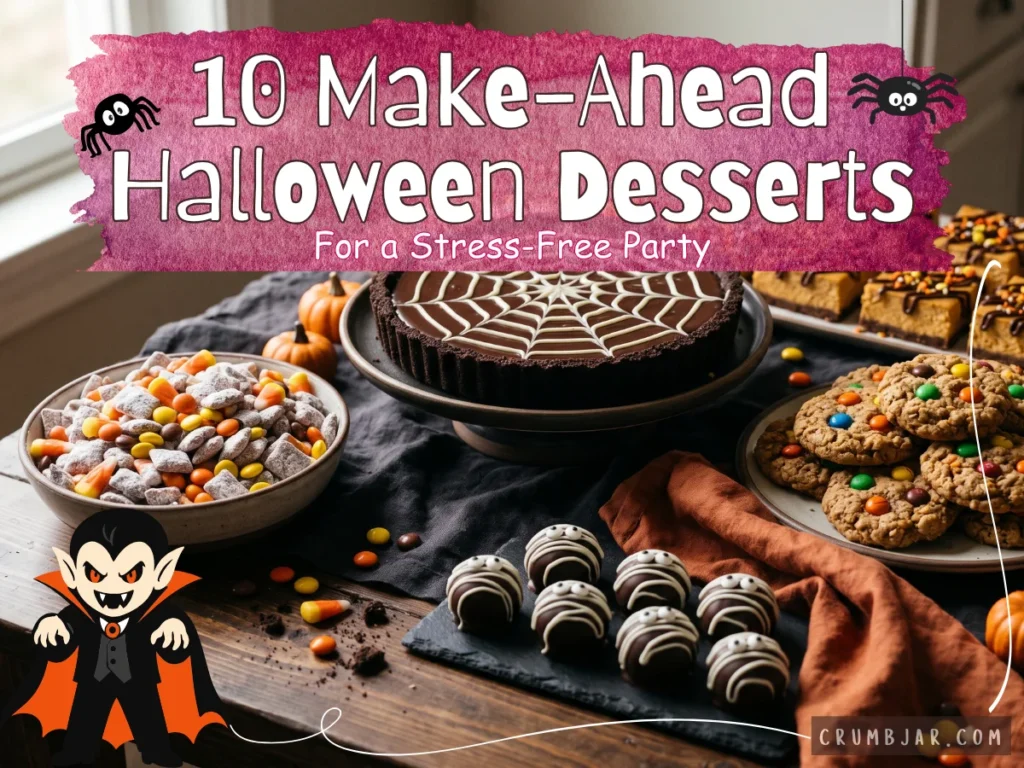
The worst place to be on Halloween night is stuck in the kitchen, piping icing while the doorbell rings and the first guests walk in. The fix is simple: choose desserts that do their hard work days ahead. These 10 make-ahead Halloween desserts chill, set, or freeze before the party, so all that is left on the day is a few finishing touches.
You will find easy Halloween party desserts for every kind of host, from no-bake puppy chow and truffles to a baked cheesecake bar and cookie dough that waits in your freezer. Five come with complete recipes, and each one includes make-ahead notes. Together, the featured recipes make about 100 servings, which makes this collection especially handy if you are planning Halloween desserts for a crowd.
Why These Desserts Made the List
Every dessert here had to earn its place by making party day easier. I looked for:
- Advance prep that actually works. Each one can be fully or mostly finished ahead of time.
- Good holding power. They stay fresh and attractive in the fridge, freezer, or an airtight container.
- Easy portioning. Scoopable snack mix, truffles, cookies, bars, and slices are simple to serve without a knife-and-plate production.
- Low party-day workload. Final steps are things like topping, sprinkling, or slicing.
- A mix of textures and methods. Three of the featured recipes need no oven at all, and two are freezer-friendly.
At a Glance: The 10 Desserts
Featured recipes (1–5) have full recipes below. Desserts 6-10 are extra ideas to round out your table.
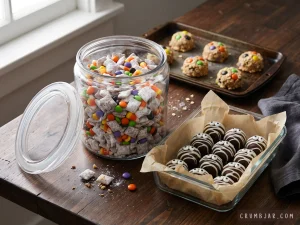
- Halloween Puppy Chow (featured): Chex cereal coated in chocolate and peanut butter, dusted with powdered sugar, and tossed with Halloween candy. No-bake and made up to 3 days ahead.
- Mummy Cookie Truffles (featured): Three-ingredient no-bake truffles dipped in chocolate and wrapped in white drizzle. Freezer-friendly.
- Freezer-Friendly Monster Cookies (featured): Chewy oat and peanut butter cookies loaded with Halloween candy. Bake from frozen.
- Pumpkin Cheesecake Bars (featured): Creamy baked bars on a graham crust that taste even better after a night in the fridge.
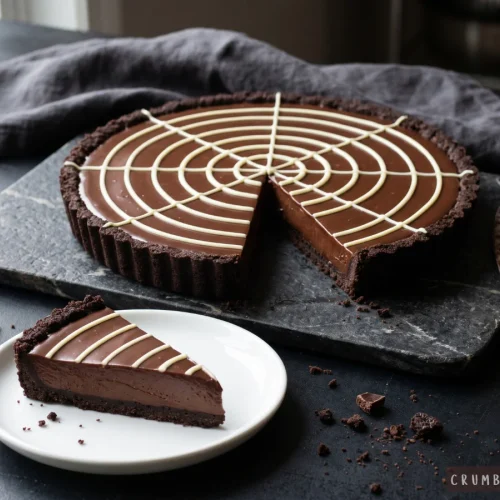
- Spiderweb Chocolate Tart (featured): A no-bake cookie-crust tart with silky ganache and a piped web. The centerpiece.
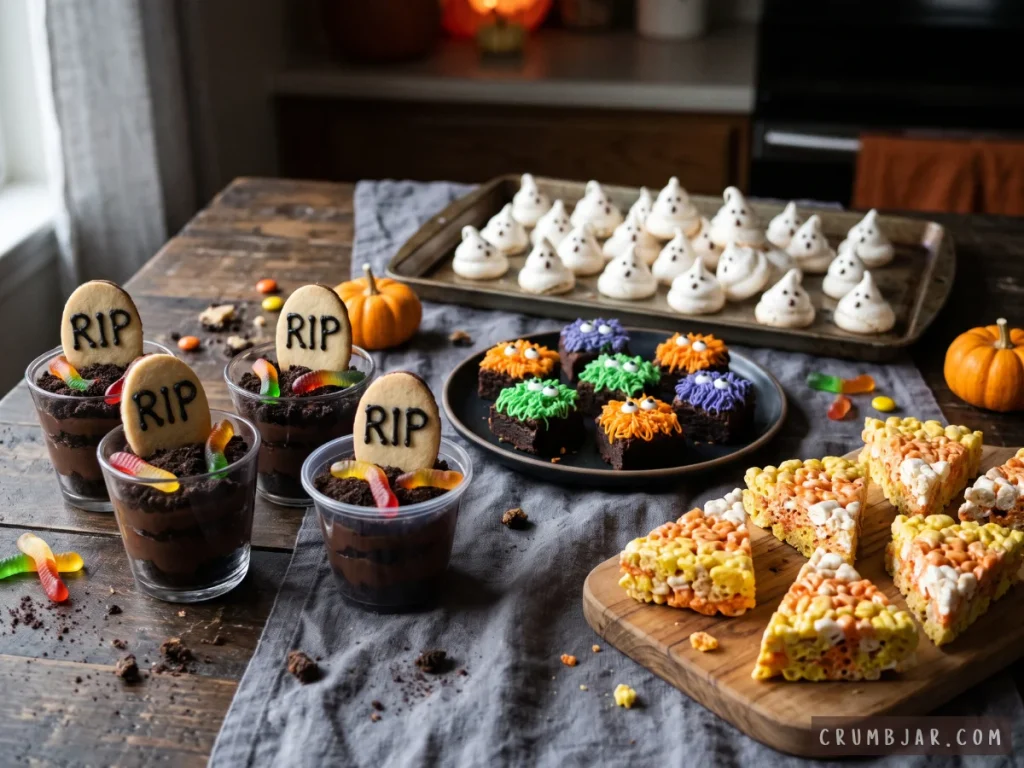
- Graveyard Dirt Pudding Cups: Chocolate pudding, cookie “dirt,” and gummy worms in individual cups. No-bake and assembled up to 2 days ahead.
- Candy Corn Crispy Treats: Marshmallow cereal bars cut into triangles and finished in candy corn colors.
- Monster Brownie Bites: Fudgy bite-size brownies with candy eyes and frosting “fur.”
- Ghost Meringue Kisses: Light, crisp meringues piped into little ghosts and dried in a low oven.
- Caramel Apple Blondies: Brown sugar blondies studded with apple pieces and swirled with caramel.
Your Make-Ahead Timeline
Here is how the five featured recipes fit together if you want the lightest possible party day.
- Up to 1 week ahead: Scoop and freeze the monster cookie dough. Make and decorate the mummy truffles and refrigerate them.
- 2 days ahead: Bake the cheesecake bars and chill them. Make the tart. Make the puppy chow, leaving out the candy.
- 1 day ahead: Pipe the spiderweb on the tart. Decorate the cheesecake bars.
- Party day: Bake the cookies from frozen. Stir the candy into the puppy chow. Slice the tart. Arrange everything and enjoy your own party.
The 5 Featured Recipes
I ordered these from easiest to most impressive, so you can start simple or go all in.
1. Halloween Puppy Chow
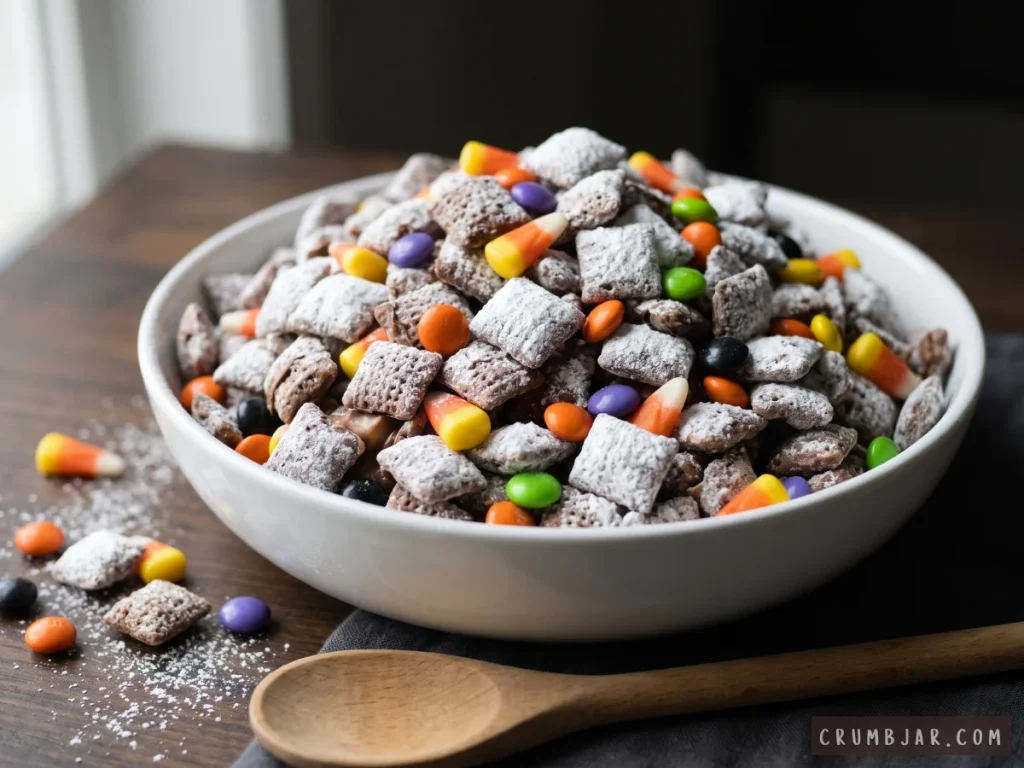
Why it works for this roundup: It is a no-bake, one-bowl dessert that you make days ahead, then scoop by the handful. It feeds a crowd with almost no effort and needs no refrigerator space.
Quick Recipe Details
- Prep time: 15 minutes
- Cook time: 3 minutes (microwave)
- Set time: 20 minutes
- Total time: about 40 minutes
- Yield: about 12 cups (12 servings)
- Difficulty: Easy
Ingredients
- 9 cups Rice Chex cereal
- 1 cup (170 g) semisweet chocolate chips
- 1/2 cup (130 g) creamy peanut butter
- 1/4 cup (57 g) unsalted butter
- 1 teaspoon vanilla extract
- 1 1/2 cups (180 g) powdered sugar
- 1 cup candy corn
- 1 cup Halloween-colored candy-coated chocolates
Equipment
- Very large mixing bowl
- Microwave-safe bowl
- Rubber spatula
- 2-gallon zip-top bag or large lidded container
- Baking sheet and parchment paper
Instructions
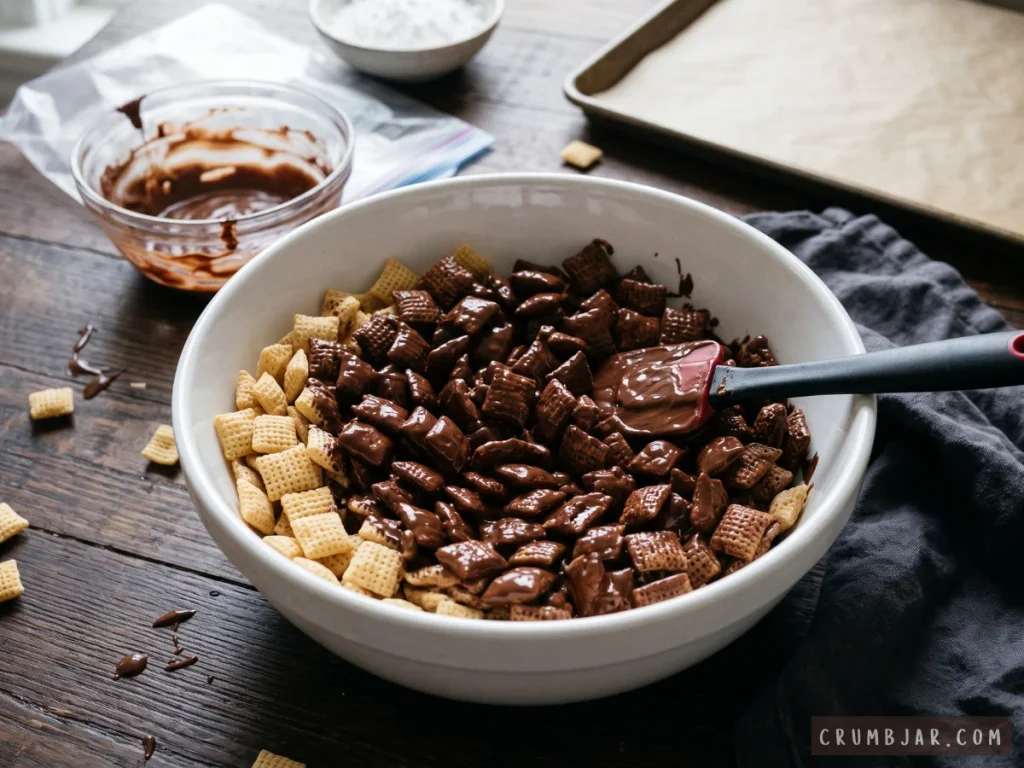
- Measure the cereal into a very large bowl. Line a baking sheet with parchment paper.
- Combine the chocolate chips, peanut butter, and butter in a microwave-safe bowl. Heat for 1 minute, then stir. Continue in 15-second bursts, stirring each time, until smooth. Stir in the vanilla.
- Pour the chocolate mixture over the cereal. Fold gently with a spatula until every piece is coated, about 1 minute, taking care not to crush the cereal.
- Put the powdered sugar in the zip-top bag. Add the coated cereal, seal the bag with some air inside, and shake until the cereal is evenly coated.
- Spread the puppy chow on the baking sheet and let it set for 20 minutes, until the coating is dry.
- Just before serving, toss with the candy corn and candy-coated chocolates.
Recipe-Specific Success Tips
- Heat the chocolate mixture in short bursts. Overheated chocolate turns thick and can clump on the cereal.
- Fold gently. Rice Chex are delicate and crush easily.
- Add the powdered sugar in two rounds if the cereal still looks sticky after the first shake.
- This contains peanuts, so label the bowl if guests may have allergies.
Storage: Store in an airtight container at room temperature for up to 5 days.
Make-Ahead: Make the puppy chow through step 5 up to 3 days ahead. Stir in the candy on party day so the colors look fresh and bright.
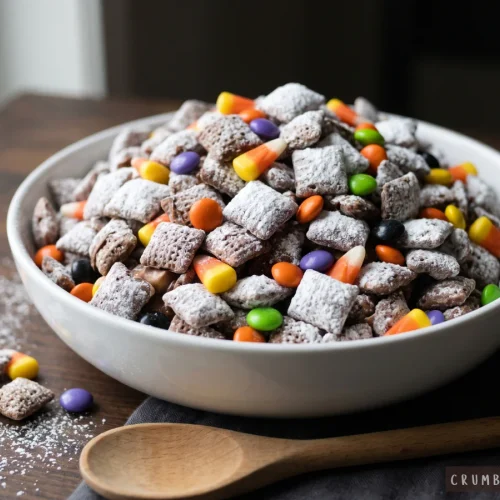
Halloween Puppy Chow
Equipment
- Very large mixing bowl
- Microwave-safe bowl
- Rubber spatula
- 2-gallon zip-top bag or large lidded container
- Baking sheet
- Parchment paper
Ingredients
- 9 cups Rice Chex cereal
- 1 cup semisweet chocolate chips
- 1/2 cup creamy peanut butter
- 1/4 cup unsalted butter
- 1 teaspoon vanilla extract
- 1 1/2 cups powdered sugar
- 1 cup candy corn
- 1 cup Halloween-colored candy-coated chocolates
Instructions
- Measure the cereal into a very large bowl. Line a baking sheet with parchment paper.
- Combine the chocolate chips, peanut butter, and butter in a microwave-safe bowl. Heat for 1 minute, then stir. Continue in 15-second bursts, stirring each time, until smooth. Stir in the vanilla.
- Pour the chocolate mixture over the cereal. Fold gently with a spatula until every piece is coated, about 1 minute, taking care not to crush the cereal.
- Put the powdered sugar in the zip-top bag. Add the coated cereal, seal the bag with some air inside, and shake until the cereal is evenly coated.
- Spread the puppy chow on the baking sheet and let it set for 20 minutes, until the coating is dry.
- Just before serving, toss with the candy corn and candy-coated chocolates.
Notes
2. Mummy Cookie Truffles
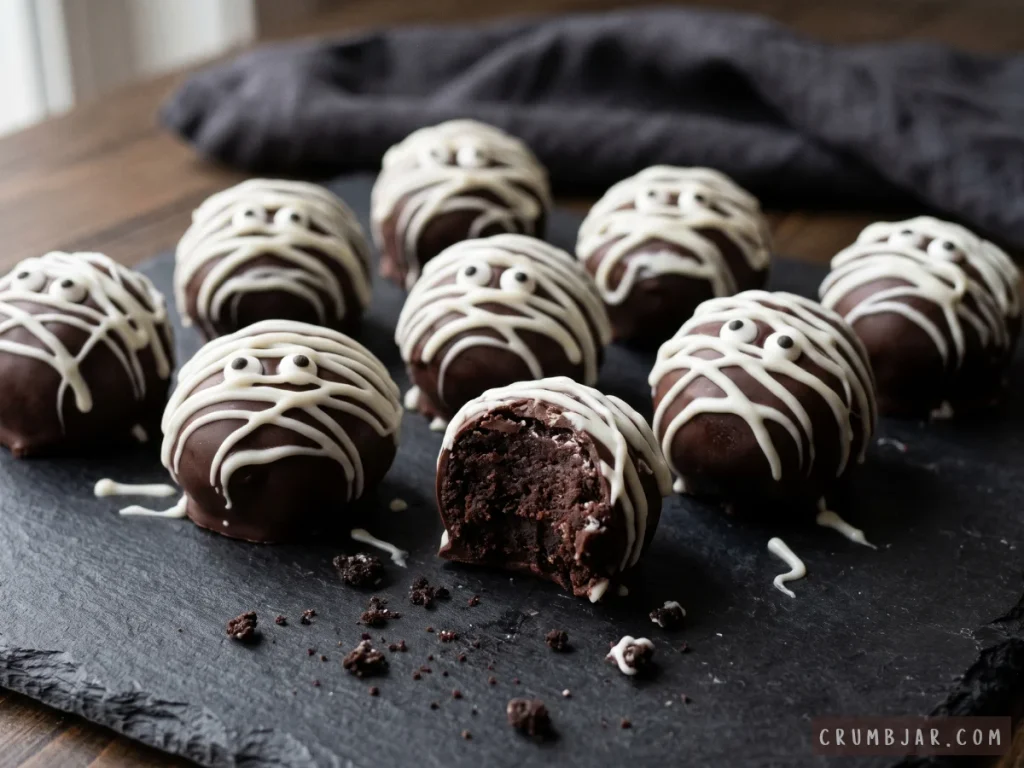
Why it works for this roundup: They are no-bake, bite-size, and sturdy, and they can be fully decorated well before the party, which makes them ideal for a dessert table.
Quick Recipe Details
- Prep time: 40 minutes
- Cook time: none
- Chill/set time: about 1 hour
- Total time: about 1 hour 40 minutes
- Yield: 36 truffles
- Difficulty: Easy to Medium
Ingredients
- 1 package (14.3 oz) cream-filled chocolate sandwich cookies (about 36 cookies)
- 1 package (8 oz) cream cheese, softened
- 12 oz semisweet chocolate melting wafers
- 2 oz white candy melts (about 1/3 cup)
- 36 mini candy eyes
Equipment
- Food processor
- Baking sheet and parchment paper
- Fork for dipping
- Zip-top bag for drizzling
Instructions
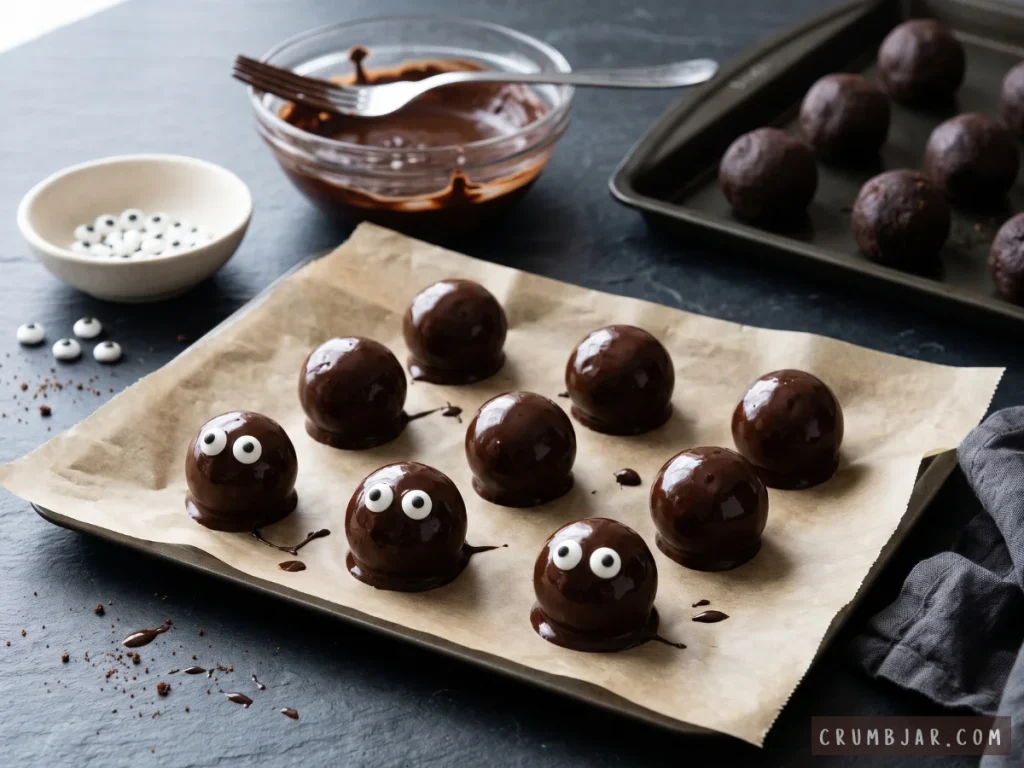
- Line a baking sheet with parchment paper.
- Process the cookies, filling and all, into very fine crumbs. Add the cream cheese and process until the mixture forms a smooth dough with no white streaks.
- Scoop level tablespoons of dough, roll into smooth balls, and place on the baking sheet. Chill for 30 minutes, until firm.
- Melt the chocolate wafers in the microwave in 30-second bursts, stirring after each, until smooth.
- Drop one chilled ball into the chocolate, turn it with a fork to coat, lift it out, and tap the fork on the bowl’s edge to shake off the excess. Slide it back onto the parchment. Work in batches and keep the remaining balls in the fridge.
- While the coating is still wet, press two candy eyes onto each truffle.
- Let the coating set, about 15 minutes in the refrigerator. Melt the white candy melts, scoop them into a zip-top bag, snip a tiny corner, and drizzle back and forth across each truffle in zigzag lines, leaving the eyes uncovered. Refrigerate 10 minutes to set.
Recipe-Specific Success Tips
- Soften the cream cheese fully so the dough is smooth and holds together.
- Dip cold balls. Room-temperature balls soften in the warm chocolate and slip off the fork.
- Stir the melted chocolate often. If it thickens while you work, warm it for 10 seconds.
Storage: Refrigerate in an airtight container, layered with parchment, for up to 1 week.
Make-Ahead: The truffles can be fully finished a week ahead. You can also freeze decorated truffles in a single layer for up to 1 month. Thaw them in the refrigerator, still covered, before serving.
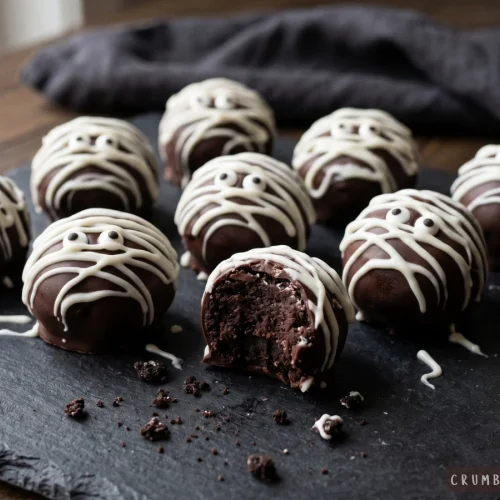
Mummy Cookie Truffles
Equipment
- Food processor
- Baking sheet
- Parchment paper
- Fork for dipping
- Zip-top bag for drizzling
Ingredients
- 1 package cream-filled chocolate sandwich cookies 14.3 oz, about 36 cookies
- 1 package cream cheese 8 oz, softened
- 12 oz semisweet chocolate melting wafers
- 2 oz white candy melts about 1/3 cup
- 36 mini candy eyes
Instructions
- Line a baking sheet with parchment paper.
- Process the cookies, filling and all, into very fine crumbs. Add the cream cheese and process until the mixture forms a smooth dough with no white streaks.
- Scoop level tablespoons of dough, roll into smooth balls, and place on the baking sheet. Chill for 30 minutes, until firm.
- Melt the chocolate wafers in the microwave in 30-second bursts, stirring after each, until smooth.
- Drop one chilled ball into the chocolate, turn it with a fork to coat, lift it out, and tap the fork on the bowl’s edge to shake off the excess. Slide it back onto the parchment. Work in batches and keep the remaining balls in the fridge.
- While the coating is still wet, press two candy eyes onto each truffle.
- Let the coating set, about 15 minutes in the refrigerator. Melt the white candy melts, scoop them into a zip-top bag, snip a tiny corner, and drizzle back and forth across each truffle in zigzag lines, leaving the eyes uncovered. Refrigerate 10 minutes to set.
Notes
3. Freezer-Friendly Monster Cookies
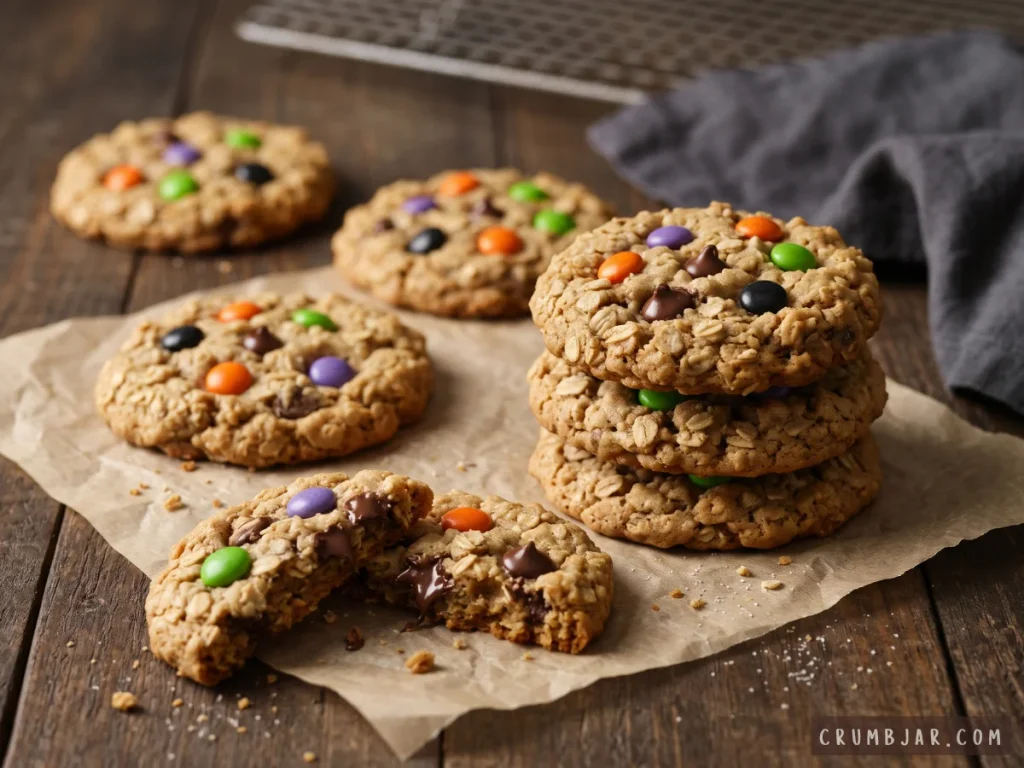
Why it works for this roundup: The dough freezes in ready-to-bake balls, so you get warm cookies on party day with almost no effort.
Quick Recipe Details
- Prep time: 20 minutes
- Bake time: 11 to 13 minutes
- Freeze time (optional): 1 hour
- Total time: 35 minutes, plus freezing if making ahead
- Yield: about 24 cookies
- Difficulty: Easy
Ingredients
- 1/2 cup (113 g) unsalted butter, softened
- 3/4 cup (150 g) packed light brown sugar
- 1/2 cup (100 g) granulated sugar
- 3/4 cup (195 g) creamy peanut butter
- 2 large eggs
- 1 teaspoon vanilla extract
- 1 cup (125 g) all-purpose flour
- 1 teaspoon baking soda
- 1/2 teaspoon salt
- 2 1/2 cups (225 g) old-fashioned rolled oats
- 1 cup Halloween-colored candy-coated chocolates, divided
- 1/2 cup (85 g) semisweet chocolate chips
Equipment
- Stand or hand mixer
- 3-tablespoon cookie scoop
- Two baking sheets and parchment paper
Instructions
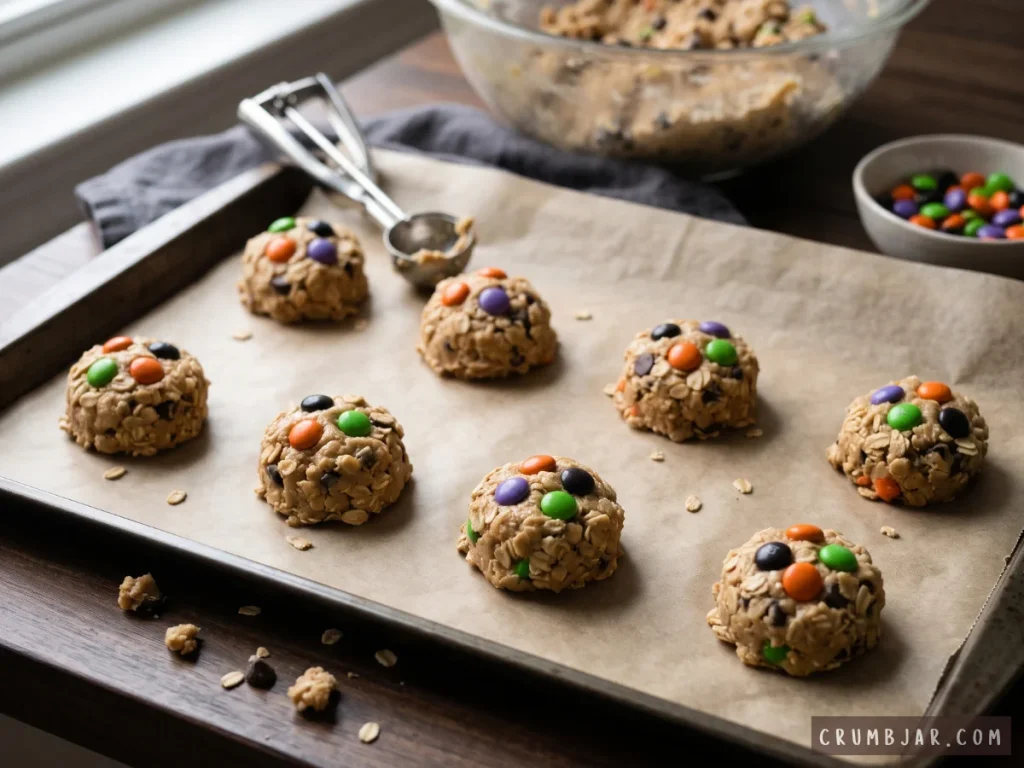
- If baking right away, preheat the oven to 350°F and line two baking sheets with parchment paper.
- Beat the butter, brown sugar, and granulated sugar for 2 minutes, until light and fluffy.
- Beat in the peanut butter, then the eggs one at a time, then the vanilla.
- Whisk the flour, baking soda, and salt together in a separate bowl. Add to the butter mixture and mix on low until just combined.
- Stir in the oats, 3/4 cup of the candy, and the chocolate chips.
- Scoop 3-tablespoon mounds onto the baking sheets, 2 inches apart. Press the remaining 1/4 cup candy onto the tops.
- Bake for 11 to 13 minutes, until the edges are set and the centers still look slightly soft. Cool on the sheet for 5 minutes, then move to a wire rack.
Recipe-Specific Success Tips
- Pull the cookies when the centers look underdone. They finish setting on the pan.
- Press candy onto the tops of each mound. Candy stirred in alone tends to hide inside the dough.
- These contain peanuts, so label the plate if guests may have allergies.
Storage: Keep baked cookies in an airtight container at room temperature for up to 4 days.
Make-Ahead: After step 6, freeze the unbaked mounds on a parchment-lined tray until solid, about 1 hour, then transfer to a freezer bag for up to 3 months. Bake straight from frozen at 350°F, adding 1 to 2 minutes to the baking time.
Freezer-Friendly Monster Cookies
Equipment
- Stand or hand mixer
- 3-tablespoon cookie scoop
- Two baking sheets
- Parchment paper
Ingredients
- 1/2 cup unsalted butter softened
- 3/4 cup light brown sugar packed
- 1/2 cup granulated sugar
- 3/4 cup creamy peanut butter
- 2 large eggs
- 1 teaspoon vanilla extract
- 1 cup all-purpose flour
- 1 teaspoon baking soda
- 1/2 teaspoon salt
- 2 1/2 cups old-fashioned rolled oats
- 1 cup Halloween-colored candy-coated chocolates divided
- 1/2 cup semisweet chocolate chips
Instructions
- If baking right away, preheat the oven to 350°F (175°C) and line two baking sheets with parchment paper.
- Beat the butter, brown sugar, and granulated sugar for 2 minutes, until light and fluffy.
- Beat in the peanut butter, then the eggs one at a time, then the vanilla.
- Whisk the flour, baking soda, and salt together in a separate bowl. Add to the butter mixture and mix on low until just combined.
- Stir in the oats, 3/4 cup of the candy, and the chocolate chips.
- Scoop 3-tablespoon mounds onto the baking sheets, 2 inches apart. Press the remaining 1/4 cup candy onto the tops.
- Bake for 11 to 13 minutes, until the edges are set and the centers still look slightly soft. Cool on the sheet for 5 minutes, then move to a wire rack.
Notes
4. Pumpkin Cheesecake Bars
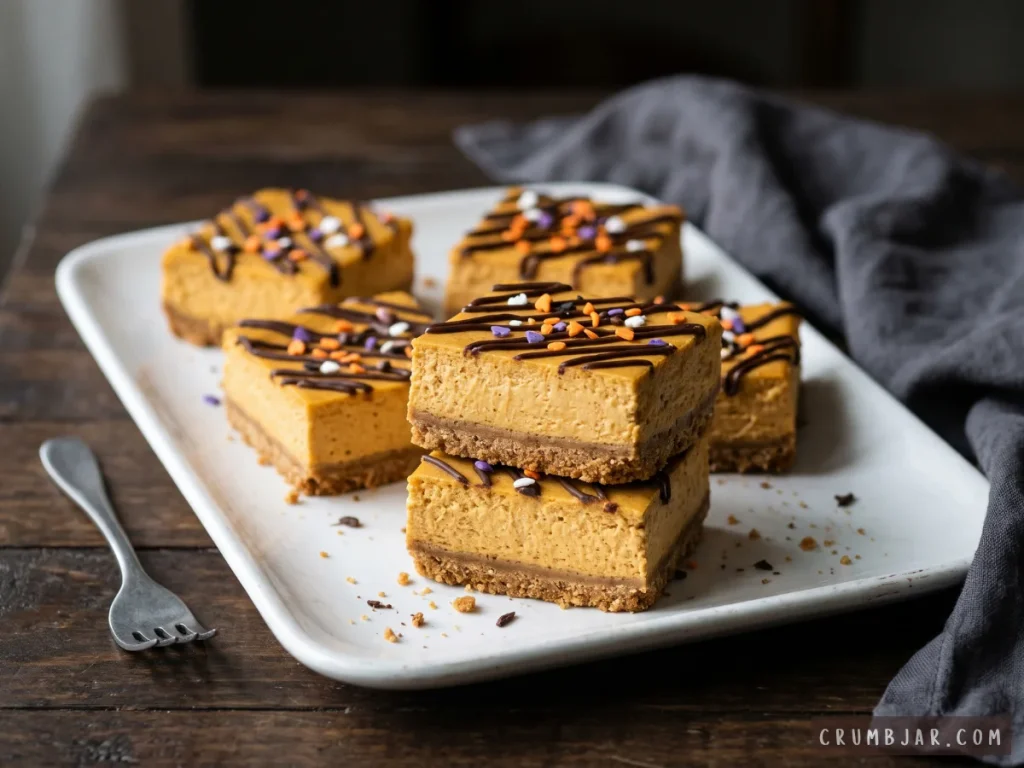
Why it works for this roundup: These bars must chill for hours, so they are naturally a do-ahead dessert. One pan makes 24 portions for a crowd.
Quick Recipe Details
- Prep time: 25 minutes
- Bake time: about 50 minutes
- Chill time: at least 6 hours or overnight
- Total time: about 8 hours
- Yield: 24 bars
- Difficulty: Medium
Ingredients
For the crust
- 2 cups (200 g) graham cracker crumbs
- 1/4 cup (50 g) granulated sugar
- 1/2 cup (113 g) unsalted butter, melted
For the filling
- 24 oz (three 8-oz blocks) full-fat cream cheese, softened
- 3/4 cup (150 g) granulated sugar
- 1/2 cup (115 g) sour cream
- 1 cup (245 g) canned pumpkin puree (not pie filling)
- 3 large eggs, room temperature
- 1 teaspoon vanilla extract
- 2 teaspoons pumpkin pie spice
For decorating
- 1/2 cup (85 g) semisweet chocolate chips
- 1 teaspoon neutral oil
- 2 tablespoons Halloween sprinkles
Equipment
- 9×13-inch baking pan
- Foil or parchment for a sling
- Mixer
Instructions
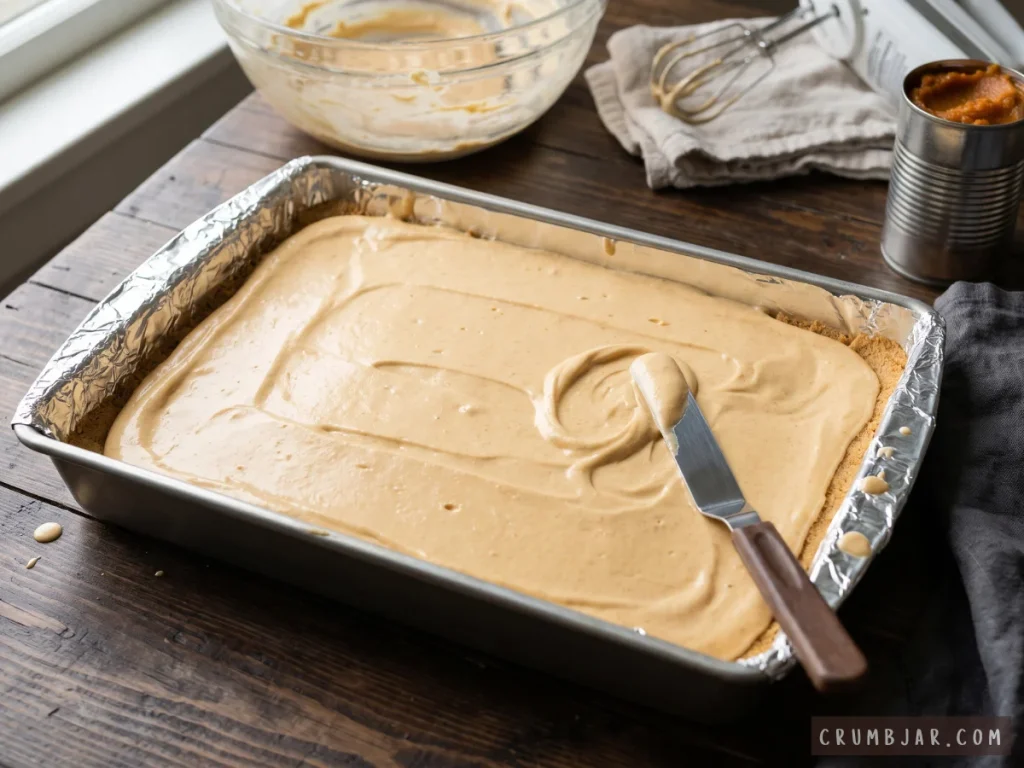
- Heat the oven to 325°F. Line a 9×13-inch pan with foil or parchment, leaving an overhang on two sides.
- Stir the graham crumbs, 1/4 cup sugar, and melted butter until the crumbs hold together when squeezed. Press firmly into the bottom of the pan. Bake for 10 minutes and set aside.
- Beat the cream cheese on medium-low until smooth, about 2 minutes. Add 3/4 cup sugar and the sour cream and beat until combined.
- Beat in the pumpkin, then the eggs one at a time, then the vanilla and pumpkin pie spice, just until blended. Do not overbeat.
- Pour the filling over the warm crust and smooth the top. Bake for 40 to 45 minutes, until the edges are set and the center jiggles slightly when you nudge the pan.
- Cool on a rack for 1 hour. Cover and refrigerate for at least 6 hours.
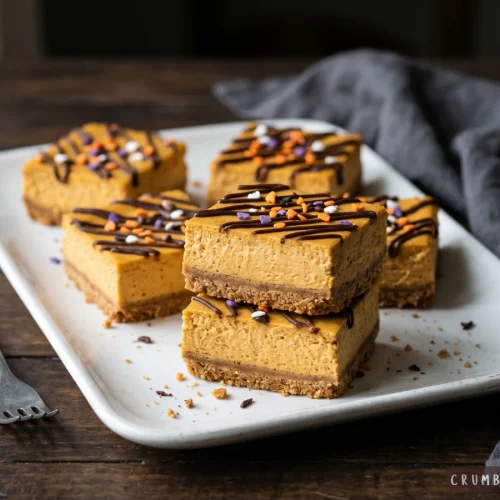
- Lift the bars out using the sling and cut into 24 bars with a clean, sharp knife, wiping it between cuts.
- Melt the chocolate chips and oil in 20-second bursts in the microwave, stirring until smooth. Drizzle over the bars and finish with sprinkles.
Recipe-Specific Success Tips
- Room-temperature cream cheese and eggs prevent lumps and help the filling bake evenly.
- Mix on low speed. Too much air can make the top puff and crack.
- For clean slices, chill the pan fully first.
Storage: Refrigerate covered for up to 4 days.
Make-Ahead: Bake and chill up to 2 days before the party. Cut and decorate up to 1 day ahead. Undecorated bars, wrapped well, freeze for up to 1 month. Thaw overnight in the refrigerator.
Pumpkin Cheesecake Bars
Equipment
- 9×13-inch baking pan
- Foil or parchment paper for a sling
- Electric mixer
Ingredients
For the Crust
- 2 cups graham cracker crumbs
- 1/4 cup granulated sugar
- 1/2 cup unsalted butter melted
For the Filling
- 24 oz full-fat cream cheese three 8-oz blocks, softened
- 3/4 cup granulated sugar
- 1/2 cup sour cream
- 1 cup canned pumpkin puree not pie filling
- 3 large eggs room temperature
- 1 teaspoon vanilla extract
- 2 teaspoons pumpkin pie spice
For Decorating
- 1/2 cup semisweet chocolate chips
- 1 teaspoon neutral oil
- 2 tablespoons Halloween sprinkles
Instructions
- Heat the oven to 325°F (160°C). Line a 9×13-inch pan with foil or parchment, leaving an overhang on two sides.
- Stir the graham crumbs, 1/4 cup sugar, and melted butter until the crumbs hold together when squeezed. Press firmly into the bottom of the pan. Bake for 10 minutes and set aside.
- Beat the cream cheese on medium-low until smooth, about 2 minutes. Add 3/4 cup sugar and the sour cream and beat until combined.
- Beat in the pumpkin, then the eggs one at a time, then the vanilla and pumpkin pie spice, just until blended. Do not overbeat.
- Pour the filling over the warm crust and smooth the top. Bake for 40 to 45 minutes, until the edges are set and the center jiggles slightly when you nudge the pan.
- Cool on a rack for 1 hour. Cover and refrigerate for at least 6 hours.
- Lift the bars out using the sling and cut into 24 bars with a clean, sharp knife, wiping it between cuts.
- Melt the chocolate chips and oil in 20-second bursts in the microwave, stirring until smooth. Drizzle over the bars and finish with sprinkles.
Notes
5. Spiderweb Chocolate Tart
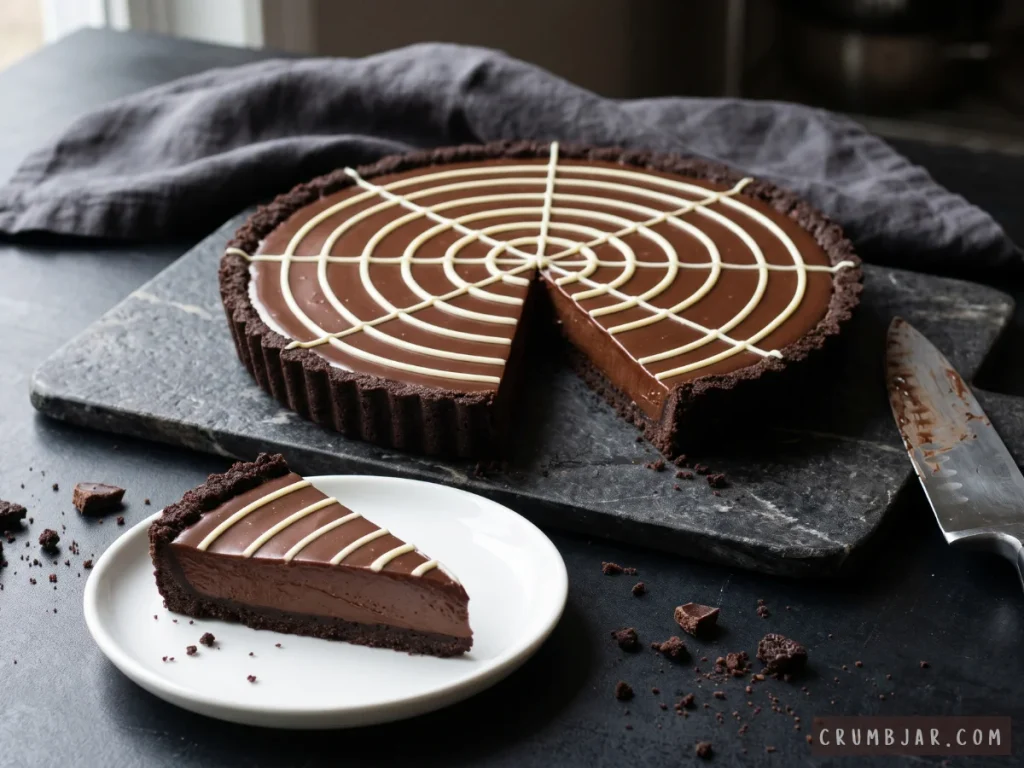
Why it works for this roundup: It looks like a bakery showpiece, yet it needs no oven and sets completely in the refrigerator ahead of time.
Quick Recipe Details
- Prep time: 30 minutes
- Cook time: none
- Chill time: 4 hours 30 minutes
- Total time: about 5 hours
- Yield: 12 slices
- Difficulty: Medium
Ingredients
For the crust
- 24 cream-filled chocolate sandwich cookies (about 2 1/4 cups crumbs)
- 5 tablespoons unsalted butter, melted
For the filling
- 12 oz semisweet chocolate chips
- 1 1/2 cups heavy cream
- 1 teaspoon vanilla extract
- Pinch of salt
For the spiderweb
- 1/2 cup white chocolate chips
- 1 teaspoon neutral oil
Equipment
- 9-inch tart pan with a removable bottom
- Food processor
- Small zip-top bag and toothpick
Instructions
- Process the cookies into fine crumbs. Stir in the melted butter until the crumbs hold together when pinched.
- Press the crumbs into the bottom and up the sides of the tart pan, using a flat-bottomed glass to pack them tightly. Freeze for 15 minutes.
- Put the chocolate chips and salt in a heatproof bowl. Heat the cream until steaming at the edges but not boiling, then pour it over the chocolate.
- Let stand for 5 minutes, then whisk gently from the center outward until glossy and smooth. Stir in the vanilla.
- Pour the ganache into the crust and tap the pan on the counter to level it. Refrigerate for at least 4 hours, until completely firm.
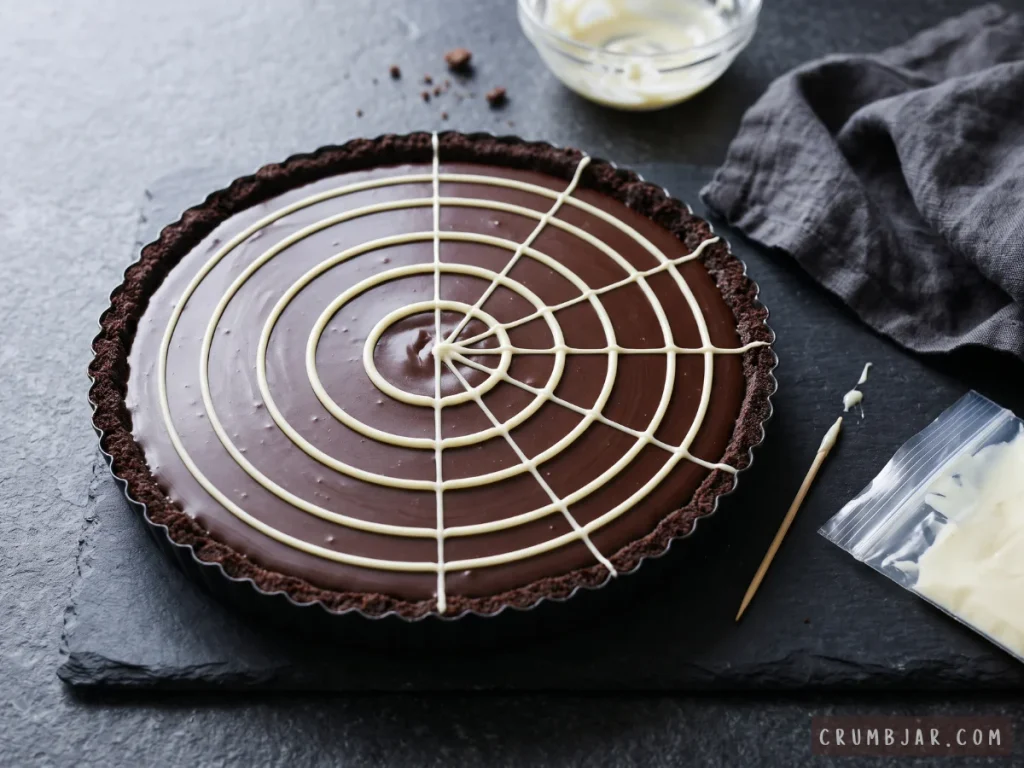
- Melt the white chocolate chips and oil in 20-second bursts, stirring until smooth. Spoon into a zip-top bag and snip a tiny corner.
- Pipe 4 concentric circles on the tart, starting from the center. Drag a toothpick from the center out to the edge at 8 evenly spaced points to create the web. Chill for 15 minutes.
- Let the tart stand at room temperature for 10 minutes before slicing with a hot, dry knife wiped between cuts.
Recipe-Specific Success Tips
- Do not boil the cream, or the ganache can turn grainy or oily.
- Pipe the circles quickly while the white chocolate is fluid, then drag the toothpick right away.
- A full 4 hours of chilling gives clean, sliceable edges.
Storage: Cover loosely and refrigerate for up to 4 days.
Make-Ahead: Make the tart through step 5 up to 2 days ahead. Pipe the web within a day of serving for the cleanest lines.
Spiderweb Chocolate Tart
Equipment
- 9-inch tart pan with a removable bottom
- Food processor
- Small zip-top bag
- Toothpick
Ingredients
For the Crust
- 24 cream-filled chocolate sandwich cookies about 2 1/4 cups crumbs
- 5 tablespoons unsalted butter melted
For the Filling
- 12 oz semisweet chocolate chips
- 1 1/2 cups heavy cream
- 1 teaspoon vanilla extract
- 1 pinch salt
For the Spiderweb
- 1/2 cup white chocolate chips
- 1 teaspoon neutral oil
Instructions
- Process the cookies into fine crumbs. Stir in the melted butter until the crumbs hold together when pinched.
- Press the crumbs into the bottom and up the sides of the tart pan, using a flat-bottomed glass to pack them tightly. Freeze for 15 minutes.
- Put the chocolate chips and salt in a heatproof bowl. Heat the cream until steaming at the edges but not boiling, then pour it over the chocolate.
- Let stand for 5 minutes, then whisk gently from the center outward until glossy and smooth. Stir in the vanilla.
- Pour the ganache into the crust and tap the pan on the counter to level it. Refrigerate for at least 4 hours, until completely firm.
- Melt the white chocolate chips and oil in 20-second bursts, stirring until smooth. Spoon into a zip-top bag and snip a tiny corner.
- Pipe 4 concentric circles on the tart, starting from the center. Drag a toothpick from the center out to the edge at 8 evenly spaced points to create the web. Chill for 15 minutes.
- Let the tart stand at room temperature for 10 minutes before slicing with a hot, dry knife wiped between cuts.
Notes
You might also like our 25 Cozy Fall Desserts for the Season.
Make-Ahead Know-How: Chilling, Freezing, and Finishing
Most of these desserts depend on three simple ideas. First, chilling is part of the recipe. Ganache, cheesecake, and pudding all set as they cool, so give them their full time. Second, freeze in stages. Unbaked cookie dough and finished truffles freeze well, but wrap them tightly and thaw them in the refrigerator to avoid condensation. Third, save the crisp things for last. Candy, sprinkles, and other toppings stay at their best when added shortly before serving.
Baking Success Tips
- Read each recipe through once and check the chilling time before you plan your calendar.
- Measure flour by spooning it into the cup and leveling it off, or use the gram weights provided.
- Bring cream cheese and eggs to room temperature for the cheesecake bars.
- Label desserts that contain peanuts if you are serving a crowd.
- Keep decorations such as candy eyes and sprinkles in a small container so you can finish quickly on party day.
Troubleshooting
- Truffle balls slide off the fork: The balls are too warm. Chill them for 15 more minutes and dip in smaller batches.
- Ganache looks grainy or oily: The cream was too hot. Whisk in a spoonful of warm cream to help bring it back together next time and heat the cream only until steaming.
- Puppy chow turns clumpy or sticky: The coating was too thick or too hot. Let the melted mixture cool for 2 minutes before pouring, fold gently, and add the powdered sugar in two rounds.
- Cookies spread too much: Your dough may be warm. Freeze the scooped mounds for 30 minutes before baking.
- Cheesecake bars cracked: The filling was overmixed or baked too long. Pull them as soon as the center has just a slight wobble. A little chocolate drizzle also hides small cracks.
Frequently Asked Questions
- How far ahead can I make Halloween desserts?
It depends on the dessert. Freezer-friendly options like cookie dough and truffles can be prepared up to a week or more ahead. Chilled desserts like the cheesecake bars and tart are best made 1 to 2 days ahead, and the puppy chow keeps well for up to 3 days. - Which Halloween party desserts are easiest to make ahead?
The puppy chow and cookie truffles are the easiest, since they are no-bake. Puppy chow needs only a microwave and a bowl, and the truffles need a food processor or a rolling pin. - Can I freeze Halloween desserts?
Yes. Monster cookie dough balls freeze for up to 3 months, and decorated truffles and undecorated cheesecake bars freeze for about a month. Thaw both in the refrigerator. - How many Halloween desserts do I need for a crowd?
Offer three or four varieties, with a mix of bite-size and sliceable options. The five featured recipes together make about 108 servings: 12 cups of puppy chow, 36 truffles, 24 cookies, 24 bars, and 12 tart slices. - How should I store make-ahead desserts?
Keep anything with cream cheese, pudding, or ganache covered in the refrigerator. Cookies, crispy treats, and puppy chow are best in airtight containers at room temperature.
Conclusion
A stress-free Halloween party starts days before the first guest arrives. Pick one or two of these make-ahead Halloween desserts, put them on your calendar, and let the fridge and freezer do the work. Your table will look like you spent all week on it, and you will have energy left for the fun parts.
Which make-ahead Halloween dessert will you prepare first?

